Assign Activities Part 1
If you come here for the first time you will have to do the following steps first, before moving on to assigning activities. First we have to learn how activity assignment works in general and secondly set it up before we can actually use them.
Activity Templates
What we’ve done until now isn’t really more than drawing our process, which could have been done with simpler tools, too. This is good to communicate the general idea of the eventual productive system (Rapid Prototyping). But now we want to breath life into our model. For that we need activities. And activities are described via activity templates. As mentioned in the Meta model chapters and the “Relevant Tools” section, activity templates are an important tool to make plug and play principle possible. Read those chapters for further information or watch the comprehensive video tutorials.
Activity templates consist of interfaces that describe the activity and the implementation. Activity templates can be rather general or more specific. Either way they are listed in the Activity Repository that has to be loaded in order to use it. If you open the ARE for the first time your list is empty. But AristaFlow comes with free activity templates you now only have to check in.
ACB Check-In
For now we have only used the Process Template Editor (PTE), but now it’s time so switch the program for a second. We open the Activity Repository Editor (ARE). It should be in the same folder as the PTE and have the same login credentials (supervisor/password). As you might already guess from the name repository the whole thing is under version control - we need to check in our activity templates.
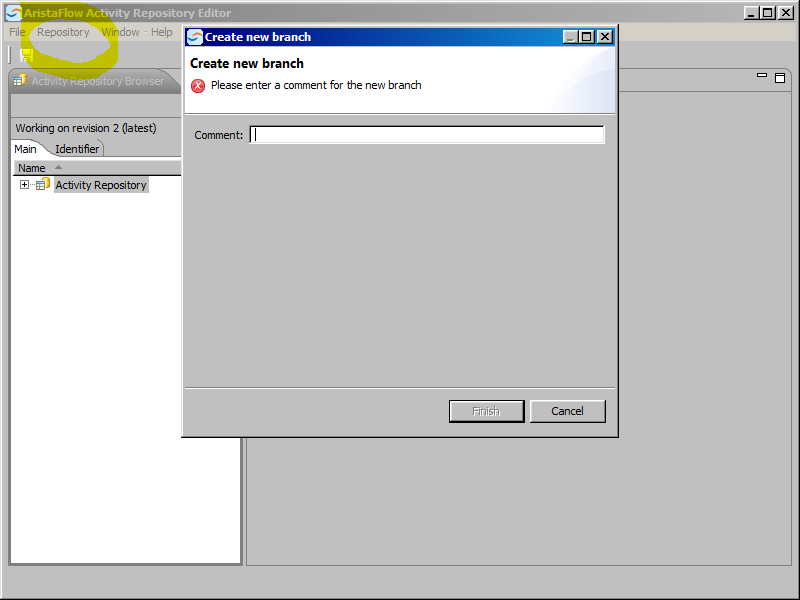
When the Activity Repository Editor has opened go to the menu at the top and select “Repository”, “Create Branch”. Enter a comment (“Init” for example). Right-click Activity Repository in the “Main” tab and select “Import EC Bundle(s)”. In the upcoming file dialogue go to \server\data\ActivityRepositoryImports, select all the bundles and press the “Open” button.
Now you would have the opportunity to change the activity templates, which is the correct term for those elements, but we’ll settle with the given and release the branch by clicking on the respective menu entry in the top bar. We close the ARE and go back to the PTE. If the ARB is still empty click on the refresh symbol to the right of that view or load the branch manually (with the button next to refresh).