Assign Activities Part 2
We already learned that activities are managed in a separate program, called the Activity Repository Editor (ARE), but we can access them via the Activity Repository Browser (ARB) within the PTE. You can find the Browser in the tab right next to the package explorer, where your projects are listed.
XOR
To select an activity we have to drill down the tree menu and then drag the activity onto the desired process step. So we will expand “de.aristaflow.form.Form”, expand “User Form” and select its child “User Form”. We drag it by holding our mouse button down and moving it over to the process step “Accept order” where we release the mouse button again. A wizard opens and we are able to fill out all the necessary information. Like a description for example, which will be shown as the header for the form at runtime. On the next page you can tell the wizard if there is any input to show or any output to store. In our case we have two data elements that will store values. Because we created and connected the data elements beforehand they should already be set into place correctly. Just click next and finish at last. We just have successfully assigned an activity to a process step. Now the employee will be able to enter the data he receives by the customer into his computer through this form.
Now for the XOR split node it gets slightly more complicated. Search for the activity template “de.aristaflow.rules.XOR” and drag the predicate onto the split node in the control flow. Another wizard opens similar to the one before. Especially useful is the suggested staff assignment, the automaticclient. So you won’t have to execute this process step by hand. We have to determine in which case the process should fire which branch of the model.
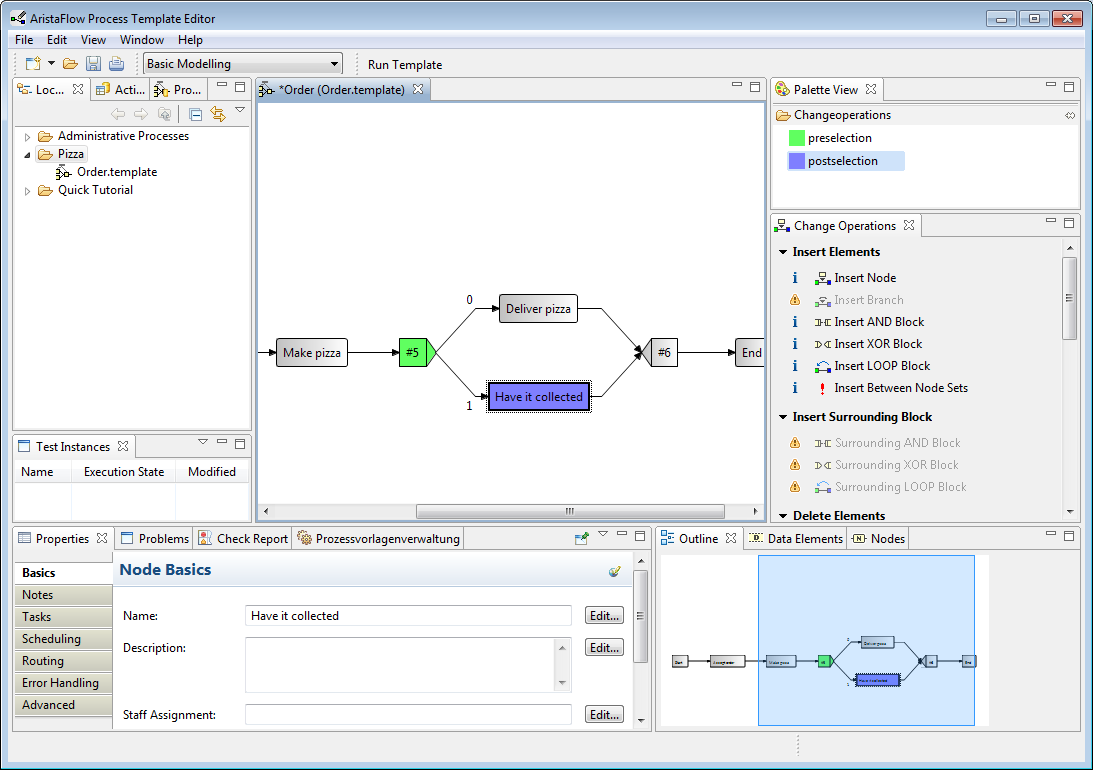
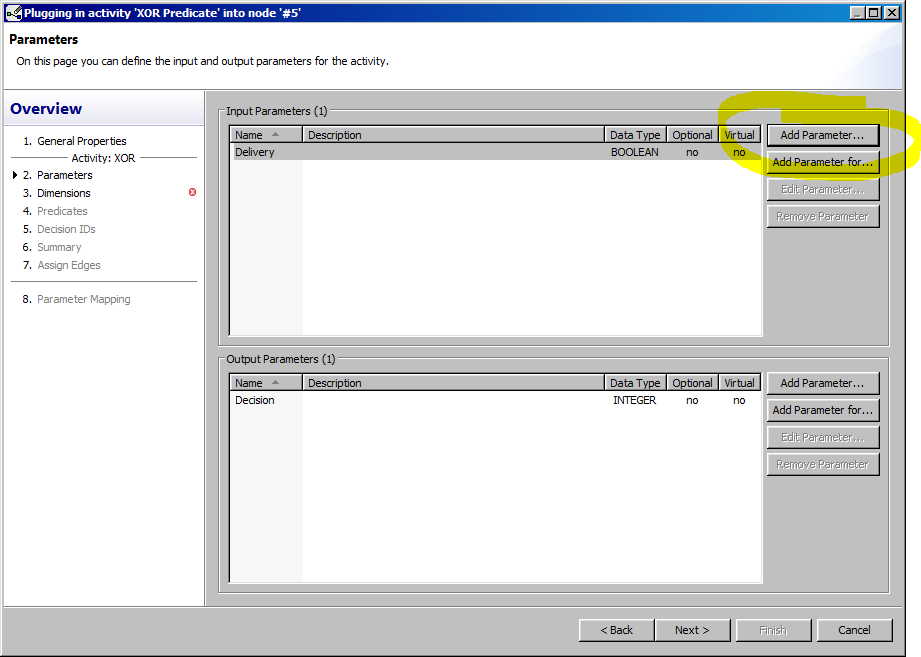
After clicking continue we notice that the input parameter is already set in place. If not, we can click “Add parameter” and do it manually. Then there is a new parameter called “Decision” that is always created by the system, it stores the further execution path and we shouldn’t change it!
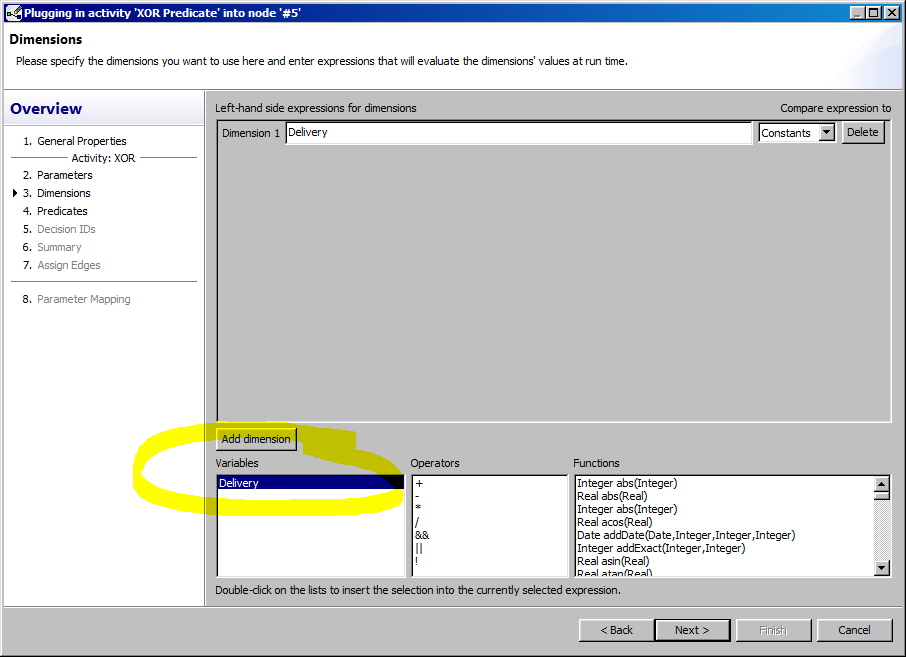
When we click next we just double click on the data element that is listed down left in the “Variables” section to add it to Dimension 1, the only dimension we need in this simple case. A dimension is the solution space, it contains all the values a variable can attain. So for example Boolean contains false and true, while Integer contains all the number between −2.147.483.648 and 2.147.483.647.
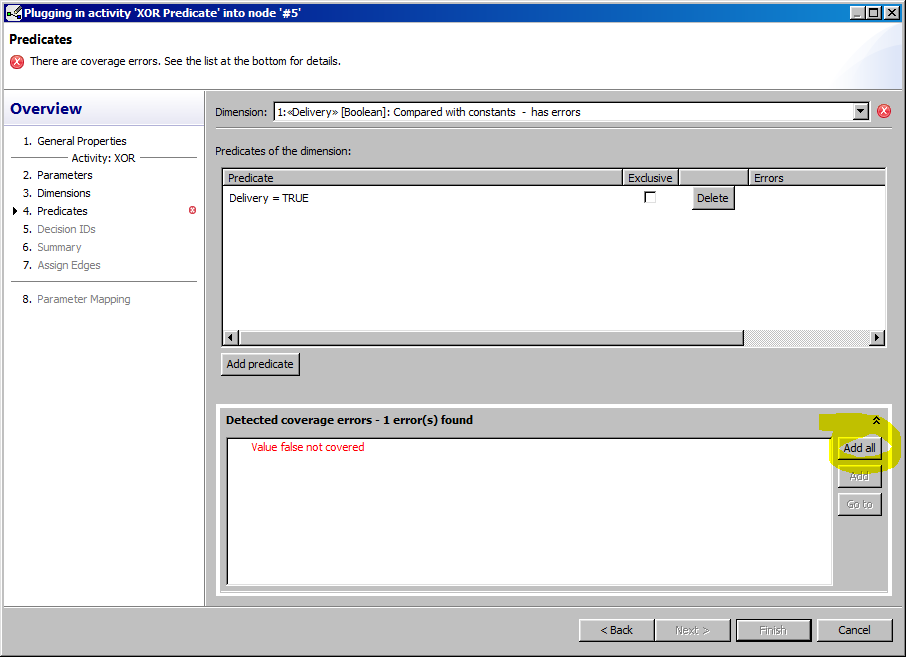
In the next window we learn that not all cases are covered. We can conveniently click on “Add all” to the right and AristaFlow will do the rest.
In the following window we now have to connect the decision ID. Just click “Add Auto” for the moment.
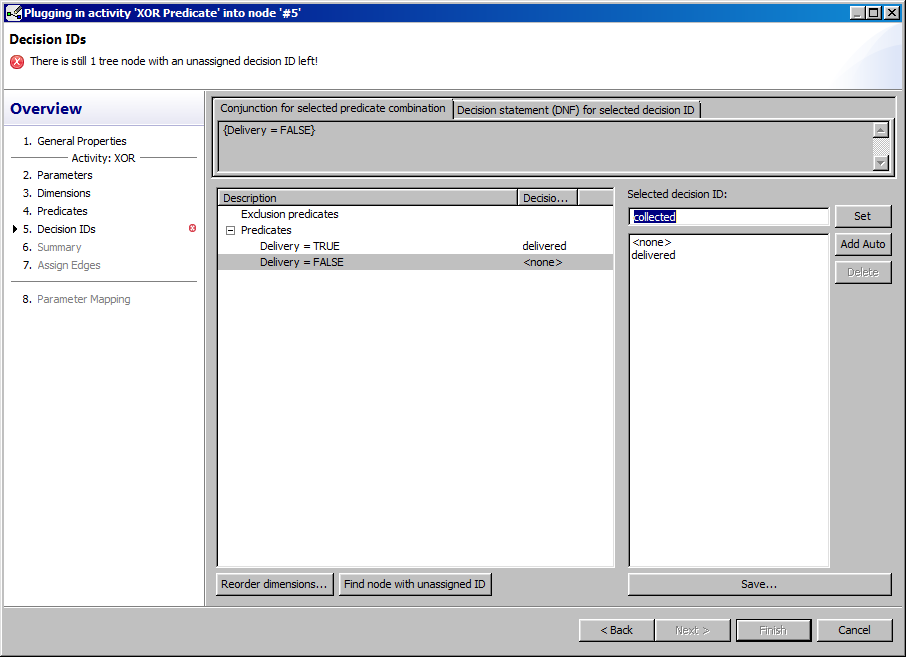
Two clicks on next and we have to match the decision to the path. In our semantics true should be linked delivery, which is path 0 and false to have it collected, which is path 1. So we select the corresponding pair and click on the arrow symbol in the middle to marry them.
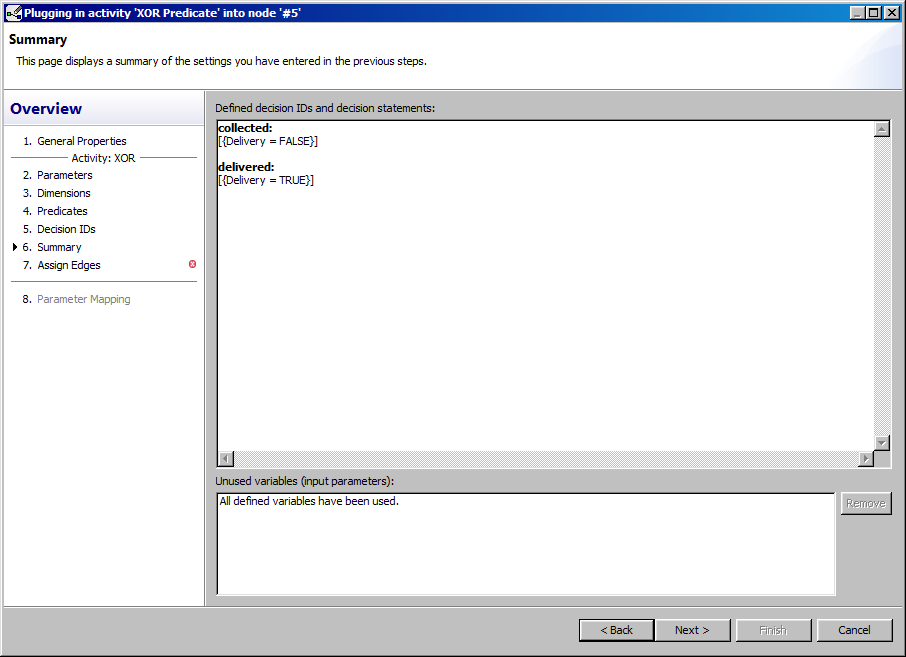
An final click on next shows a summary of the input and output parameters. The “Decision” output parameter should have a new data element. Then we click finish.

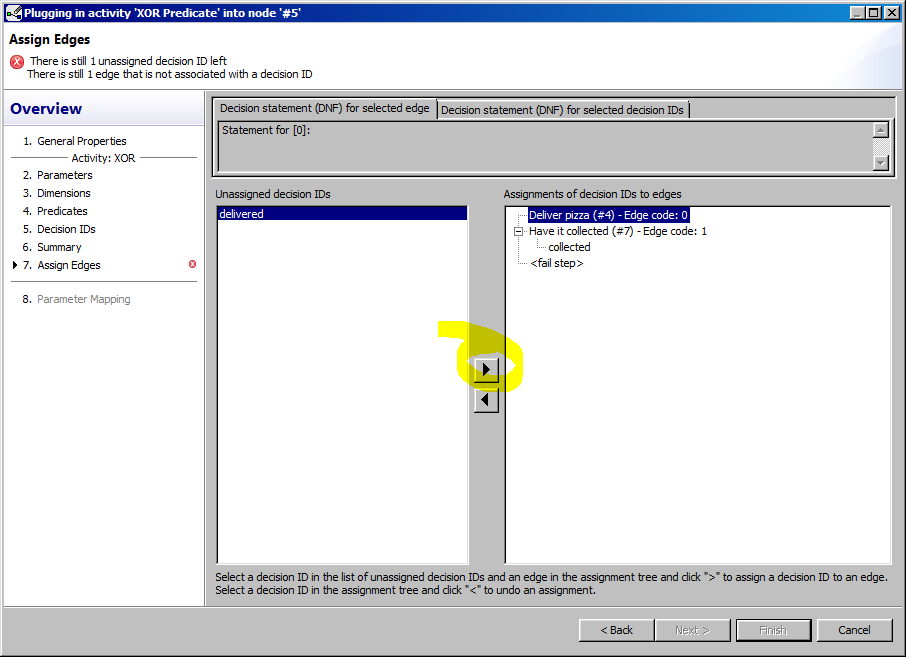
As you can see from the multiple red warning signs and outputs the correctness by construction principle ensures that all possible input value combinations used for decisions are mapped to an outgoing branch. A typical mistake would be for example to check for smaller X and bigger X but not X itself. The wizard will inform you about that no matter how complex the scenario is.