Assign Staff
Just like any other modern company our pizza delivery is based on the division of labour. So in order to assign employees to each process step (or more precisely staff assignment rules), we have to map our team to the AristaFlow OrgModel first. The OrgModel is completely separate from our process, the process is exchangeable. So we have to start another tool, namely the OrgModel Editor (OME). You should find it in the same location as the other suite tools. We again log in as the supervisor with “password”.
Creation
In our little example we will have the following organizational entities:
- OrgUnit: PizzaService, PizzaBaking, PizzaDelivery
- OrgPosition: PizzaAcceptance, Chef, Driver
- Agents: DeTina, DeToni, DeHarry
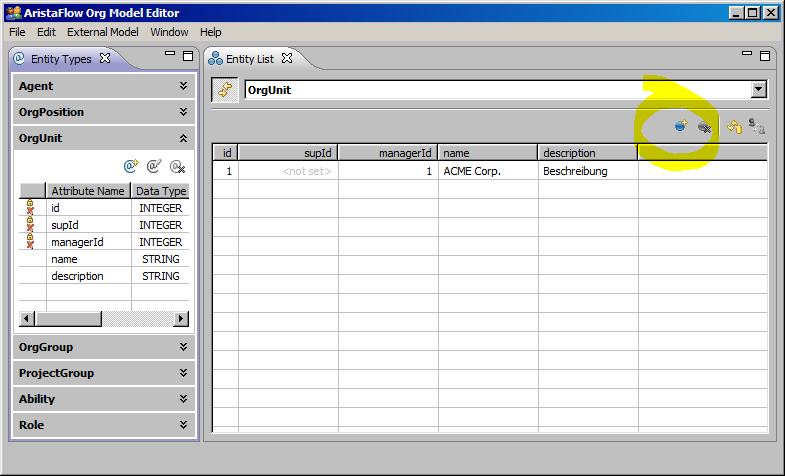
To create a new OrgUnit we select the according section in the left window, called “Entity Types”. With a click on the “Add Entitity” button a new window opens on the right side. Here we can fill out the desired attributes of any selected entity and save them by clicking on the floppy disc symbol. If we hit the refresh button in the “Entity List” in the middle of the screen, it should list our newly created OrgUnit, provided the drop down menu is set to OrgUnits at all.
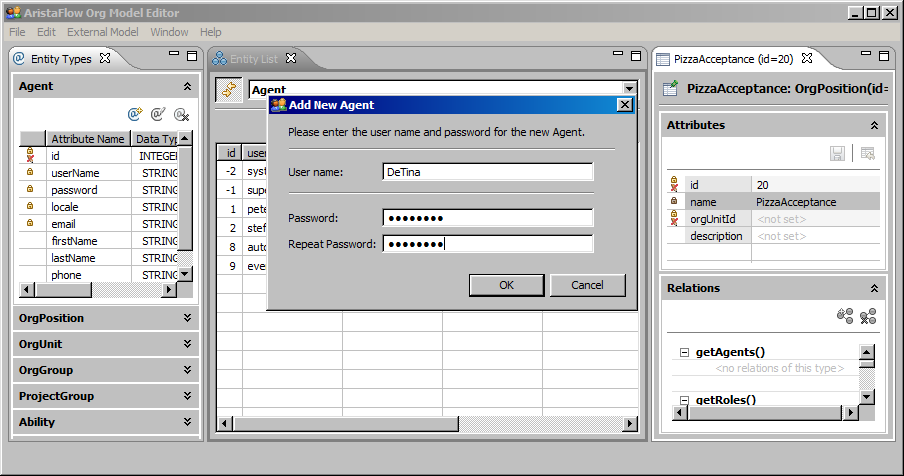
To create the other entities just repeat the steps accordingly. For the agents just set “password” as the login password.
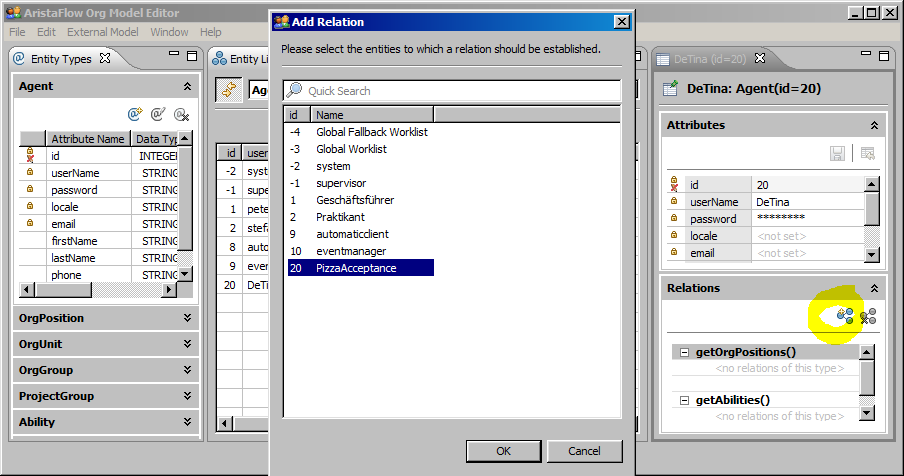
Now we have all the entities necessary, but they still lack relation. To change that we select each entity, go the “Relations” view on the right side, select the according rules and add the desired entities by clicking on the “Add Relation” button on the top of the view.
Assignment
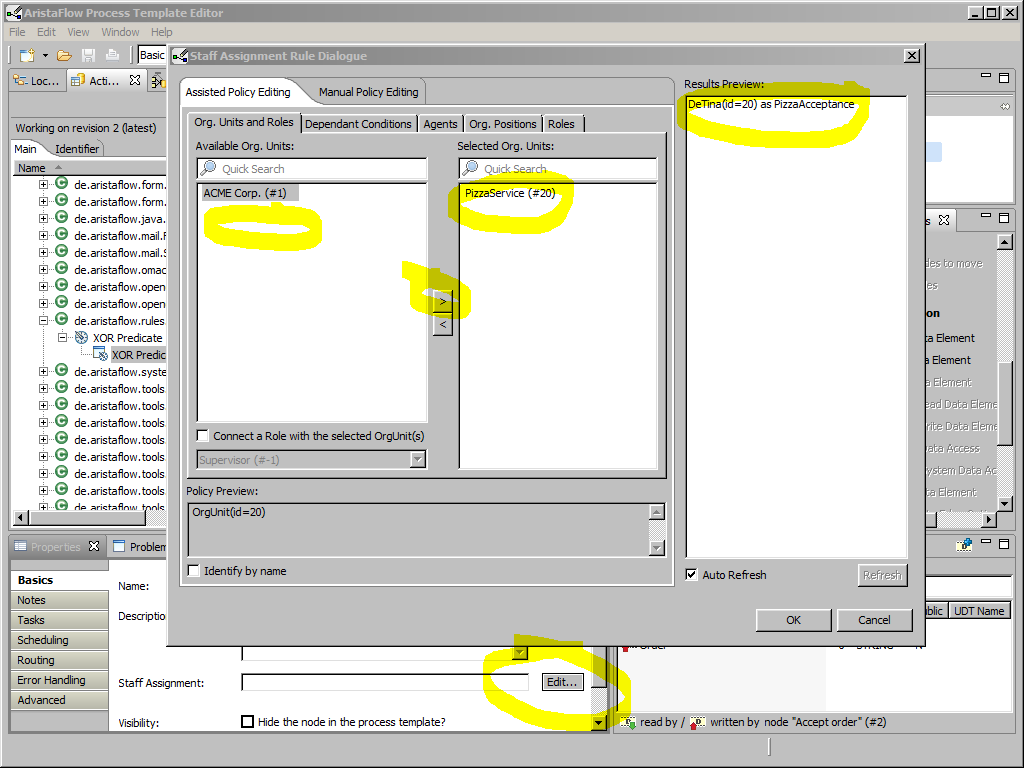
Now that we created the hierarchy of our organisation, we have to assign the entities to the process steps. Back in the PTE we’ll start at the “Accept order” activity by selecting it and go to the “Properties” view, where we’ve been a couple of times before to name the node for example. There is also a field for staff assignment. So we click “Edit…” and a new wizard dialogue opens. In this basic tutorial we will focus on the “Assisted Policy Editing”. In the tab “Org. Units and Roles” we select our “PizzaService” and click the arrow button, because that one is going to handle the orders. So now we see all the agents that are qualified for the job in the right window. This is it, click “OK”.
Repeat the steps for the following process steps:
- Make Pizza: PizzaBaking
- DeliverPizza: PizzaDelivery
- Have it collected: PizzaService
Now we’re done, aren’t we? Not quite, depending on how you “plugged in” the XOR predicate we might still have to assign staff to that activity, too. But since nothing special is going to happen, because all the information necessary to carry out the task is given, we are able to delegate the execution to the automaticclient.
So we open the OrgModel wizard on the XOR split node and switch to the tab OrgPositions where we select “automaticclient”. At least in test mode this will save you a little bit of time.
Bonus
To go into a little more depth here already, we can also make dependant staff assignment rules, instead of just working with concrete OrgUnits, Agents, etc.
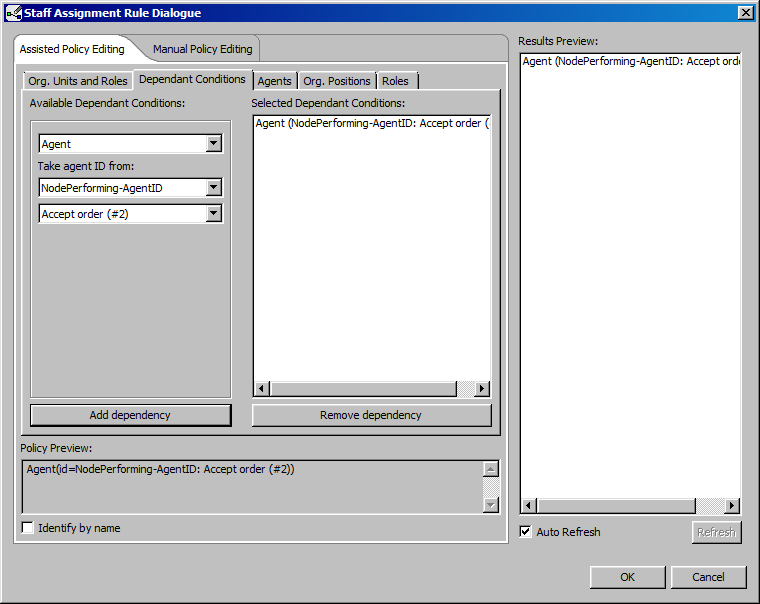
In this example we are going to define that whoever accepted the order is going to hand out the pizza to the customer if he chooses to collected it by himself. So we open the staff assignment wizard on the “Have it collected” process step and go to the “Dependent Conditions” tab. We then select Agent in the first drop down menu and “NodePerforming-AgentID” in the second. You notice that there are different options available that are pretty self explanatory. A third drop down menu appears and we select the “Accept order” node, add the dependency, check the “Results Preview” and hit “OK”.