Control Flow Modeling
If you’ve already read the introduction you know that in AristaFlow you don’t set the control flow into place by drawing the necessary elements or by connecting given elements by hand. Instead there is a strict set of operations you can apply only under certain circumstances, preventing erroneous structures from ever occurring in the first place. Thereby you have Correctness by Construction and make extra error checks regarding the structure unnecessary.
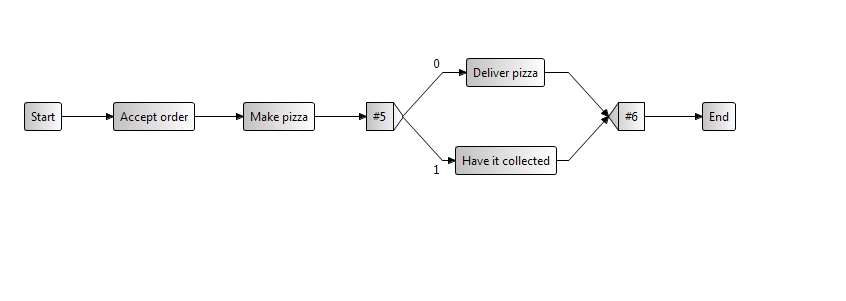
Our final process shall look like this:
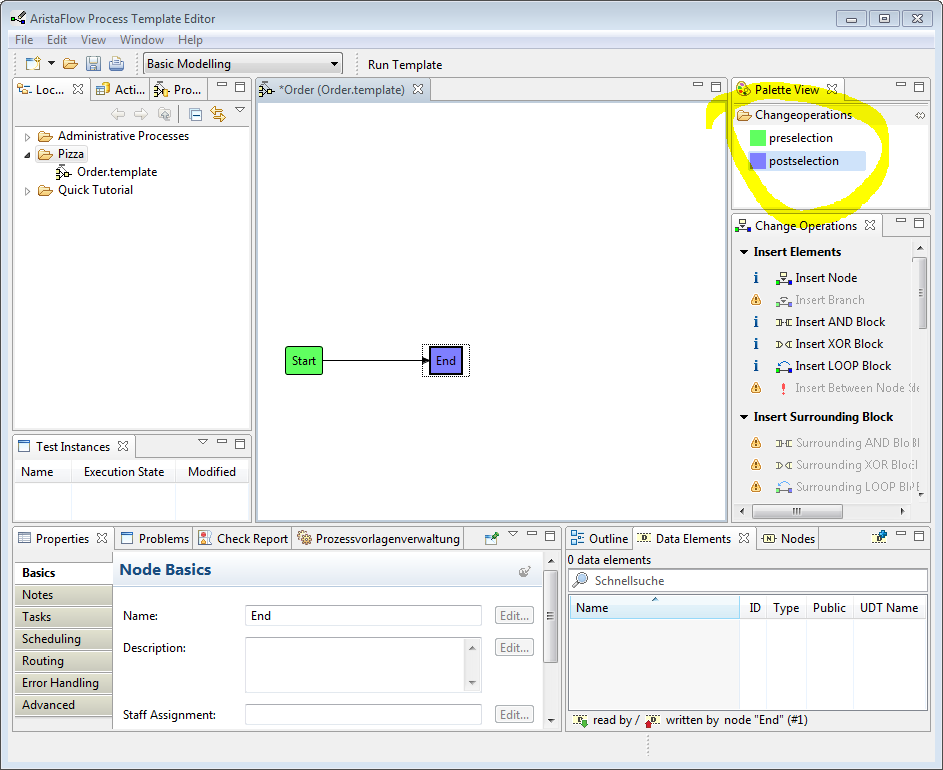
So how does that work in practise? You will have to mark a node with preselection and another one with postselection. Now you are offered every possible option to change the graph without violating the correctness of it. For our pizza business to flourish we will need to accept orders, so the first thing we do is creating a process step that handles that. We click on the preselection button in the top right window of the PTE, called “Palette View”. Then we click the start node. The start node should now be green. We go back to the “Palette View” and click on postselection this time and apply it to the end node in the same fashion. Now the end node should be blue (or purple if you ask me).
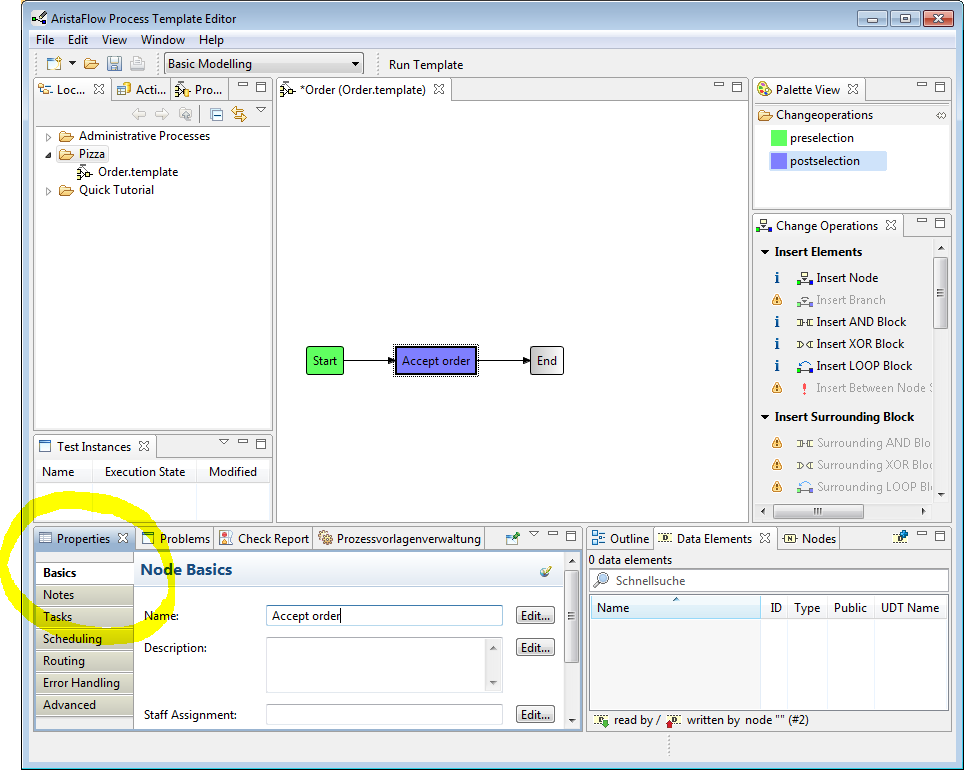
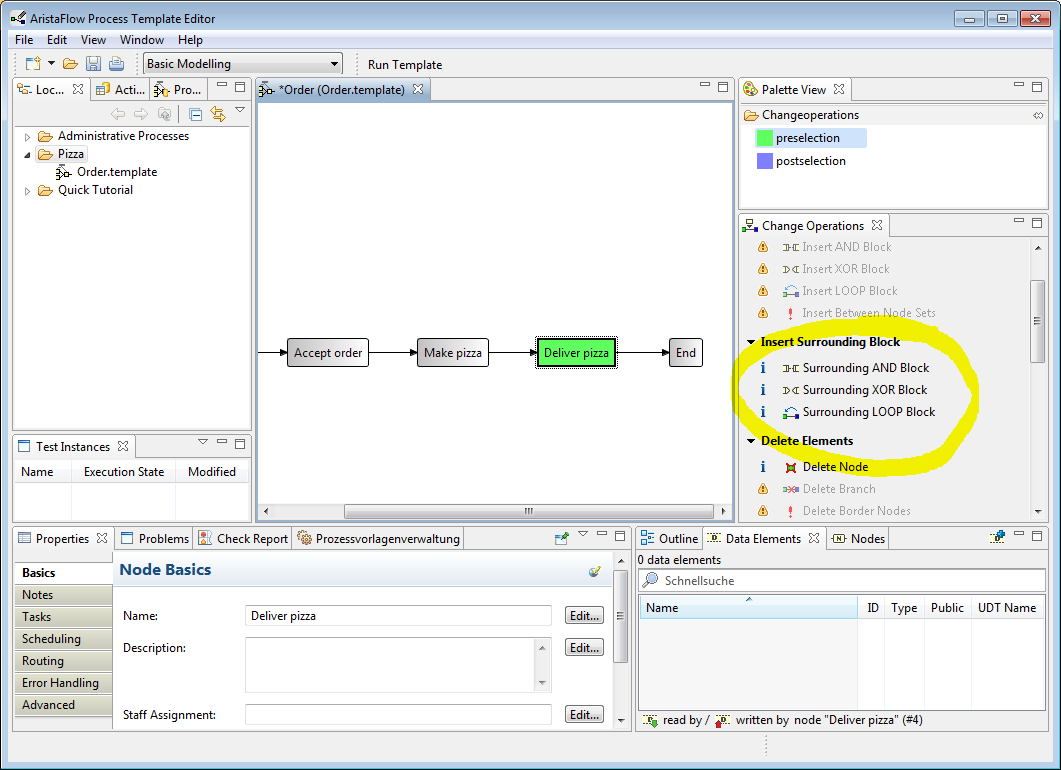
Now we’ve done everything to enable the option “Insert Node” in the “Change Operations” view right below the “Palette View”. Maybe you noticed that it was greyed out before. We click it and a new node is inserted right between the start node and the end node, just like we defined it. To give it a better fitting name we go to the properties view on the bottom of the PTE, make sure the “Basics” menu entry is selected and enter “Accept order” as the new name. We save it by leaving the input field.
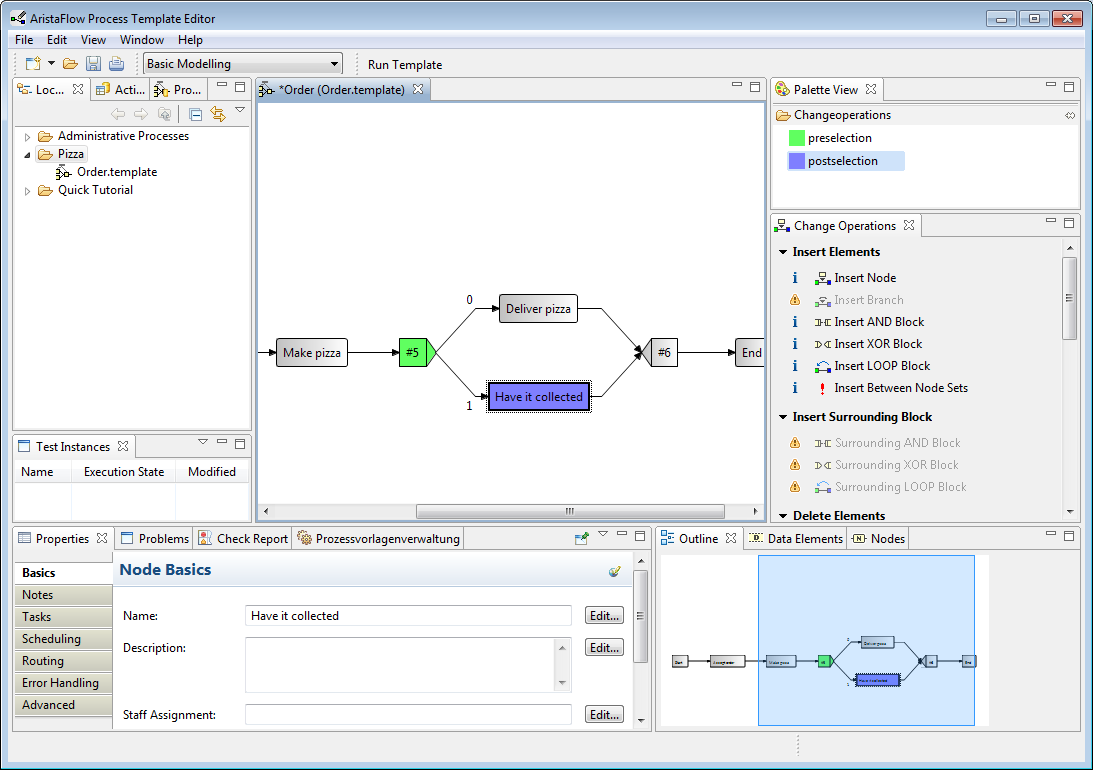
We repeat the insertion of a node two more times until it looks like in this figure below. When we have the process steps “Accept order”, “Make pizza” and “Deliver pizza” set in place, we will construct a branch to give an alternative to the delivery, namely “Have it collected” (by the customer). We select the process step “Deliver pizza” with preselection and have nothing else selected with the postselection. When you look at the picture above you notice that otherwise inserting surrounding blocks won’t be enabled.But this what we need in this case. So we click on “Surrounding XOR Block”. Of course there are different ways to come to this model eventually. But we will assume, that at first we hadn’t thought of letting the customer fetch her pizza herself.
“Deliver pizza” is now surrounded by two different looking nodes and the option to insert a branch should be available. After we inserted an empty branch, we directly click on “Insert Node” and give it the right name again.